First Time Set Up for Live Chat for Microsoft Teams
You've added Live Chat to your Team - Great! Here are five tasks that you should complete to make sure it's set up properly.
First Time Setup
* Each Team member should install your Live Chat app onto their Microsoft Teams account in the left sidebar so that they can access their Personal Agent Settings.
* The Microsoft Teams channel that you add the Live Chat tab to must be ‘Public’. Teams does not allow bot interaction with private channels.
1. Add a Live Chat Tab to your Team right from Microsoft Teams.
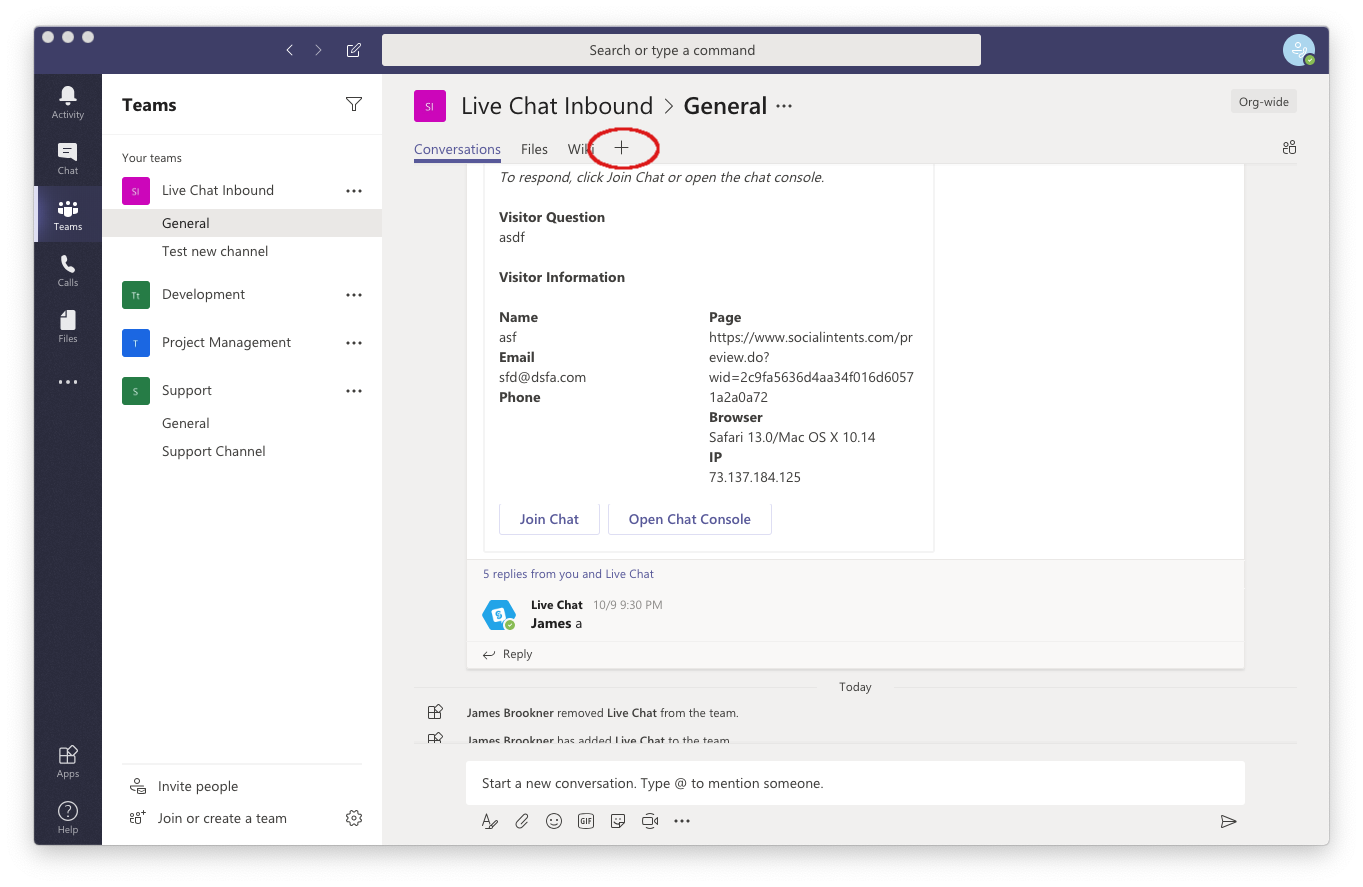
If you have already added a Live Chat tab to your Team while installing our app, great! Your tab should look like the image below and will include the circled Live Chat tab.
You can also use this link: Add Live Chat to Teams.

Now, select the ‘Sign In with Microsoft’ button to authorize Live Chat for your Teams account. That's it - you don't need to sign up for a separate account.
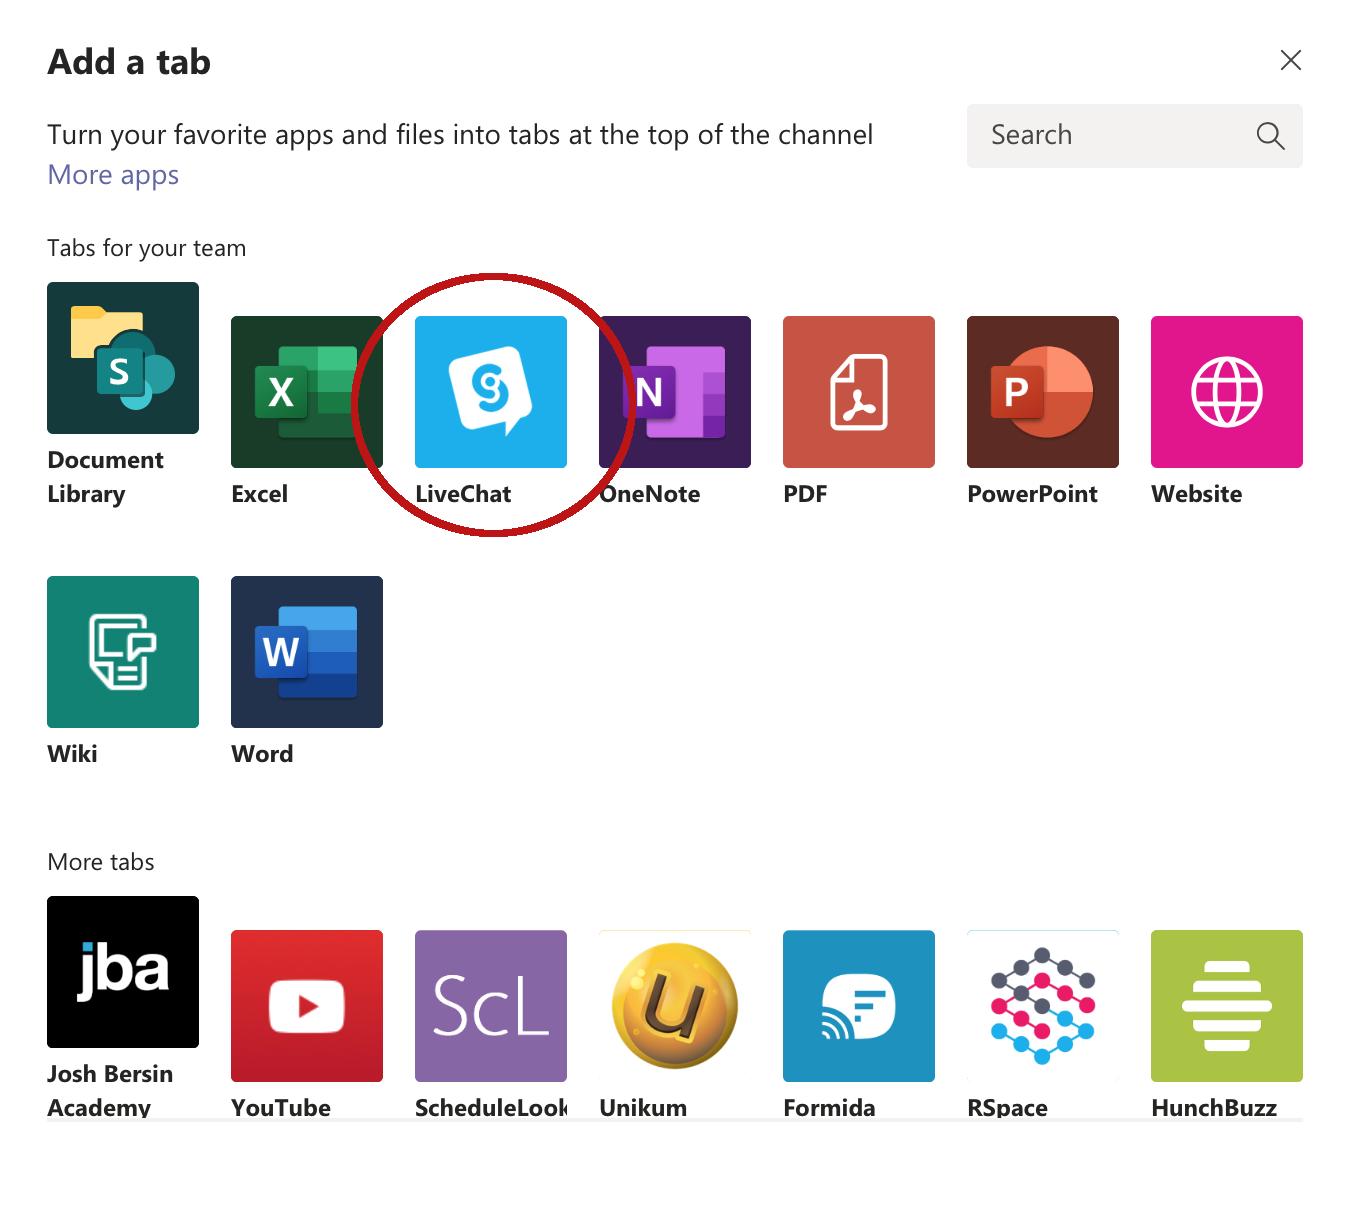
If you have not yet added a Live Chat tab to your Team or do not see the Live Chat tab yet, just click the '+' button at the end of the tab list.
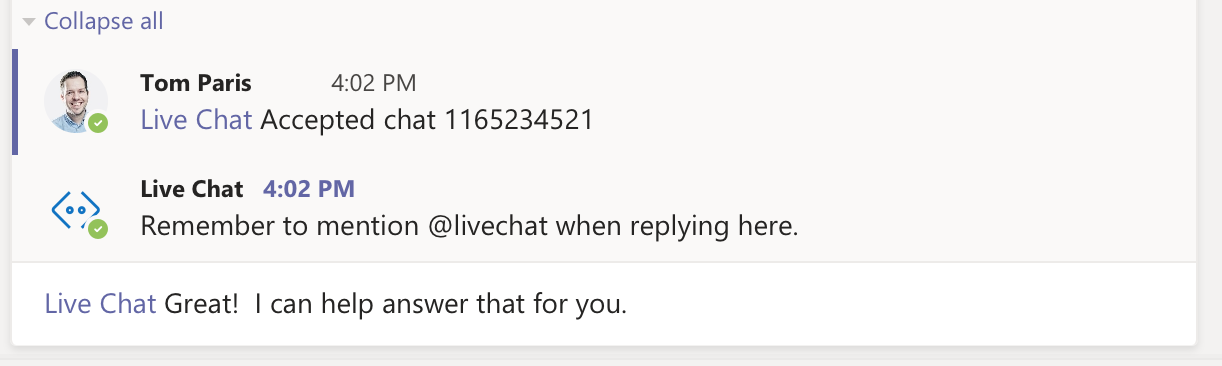
Chat requests will be sent to the shared Team channel for every Live Chat.
You can reply to chats from the Team conversation or the dedicated ‘Live Chat’ tab.

Next, mention our ‘@Live Chat’ bot in your posts of this channel to make sure we see your messages.
2. Next, to access your Chat Settings and Agent Settings, add the Live Chat app to your personal workspace.
Click on the 3 dots in the left sidebar and search for ‘Live Chat’. 
If you have not yet added your app to your Team, FIRST choose the option ‘Add to a Team’ and select the Team that you have added your Live Chat tab to. THEN, select ‘Add’ to add Live Chat to your personal workspace.
(Note: If you don't see it in the left sidebar when selecting the horizontal dots icon, search for ‘Live Chat’ and select it.)
Each Team member should also add your Live Chat app to their workspace individually, as this is how your Team members can change their Agent Settings, such as their photo and nickname.

* If you aren't receiving chat requests to your team:
If you are not receiving Live Chat request notifications to your Team, you may not have added the app to a Team when originally installing. You can always uninstall and re-install the app to your workspace in the following article. See this article on how to uninstall and reinstall the app to your personal workspace.
3. Turn on your Channel Notifications.
By default, new Post Notifications are turned off. To make sure you never miss a Live Chat request, turn on your Channel Notifications. Just click the 3 dots next to your Team’s ‘General’ channel. Then, on the popup, choose ‘All New Posts’: 'Banner and feed': then ‘Save’.

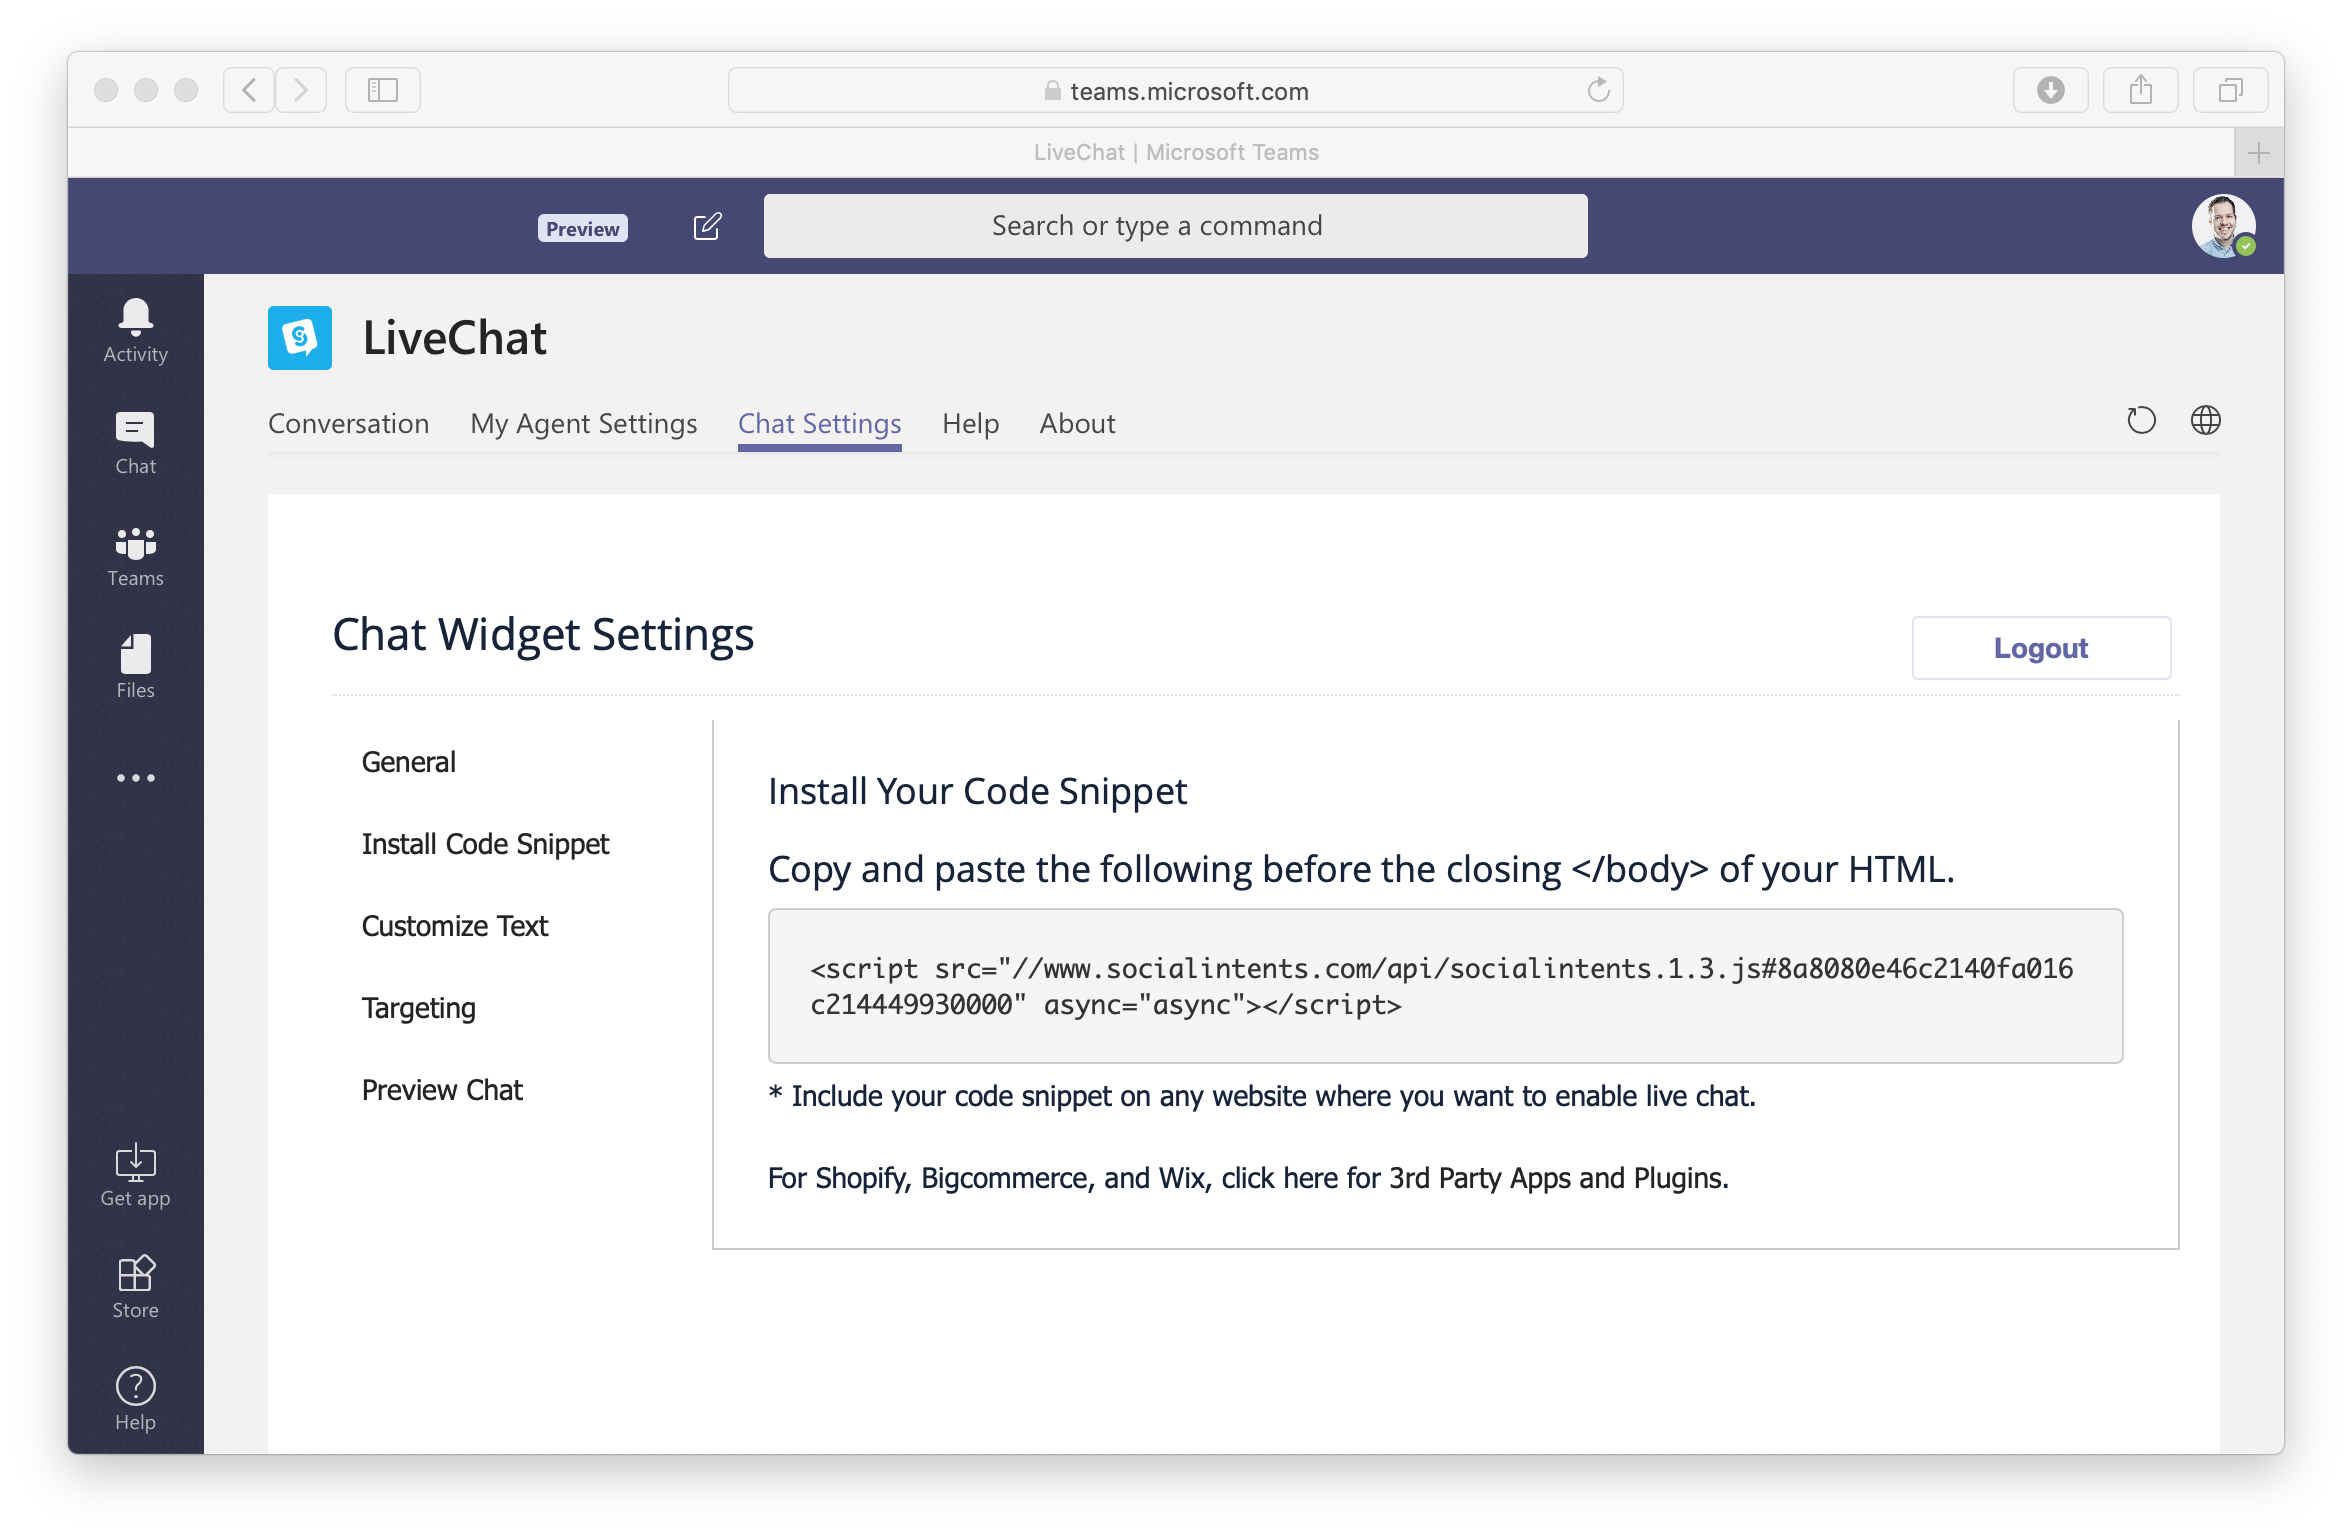
4. Add your code snippet to your website.
Go to the Live Chat app settings and select the ‘Code Snippet’ option to find your code snippet.
You can access the Live Chat app settings from the left-hand navigation by clicking the horizontal 3 dots, then choosing Live Chat. If you don't see your Live Chat listed here, add it by selecting the ‘Browse all apps’ button, then adding Live Chat.

Once in the app settings, choose the ‘Chat Settings’ tab, then choose 'Install Code Snippet'.
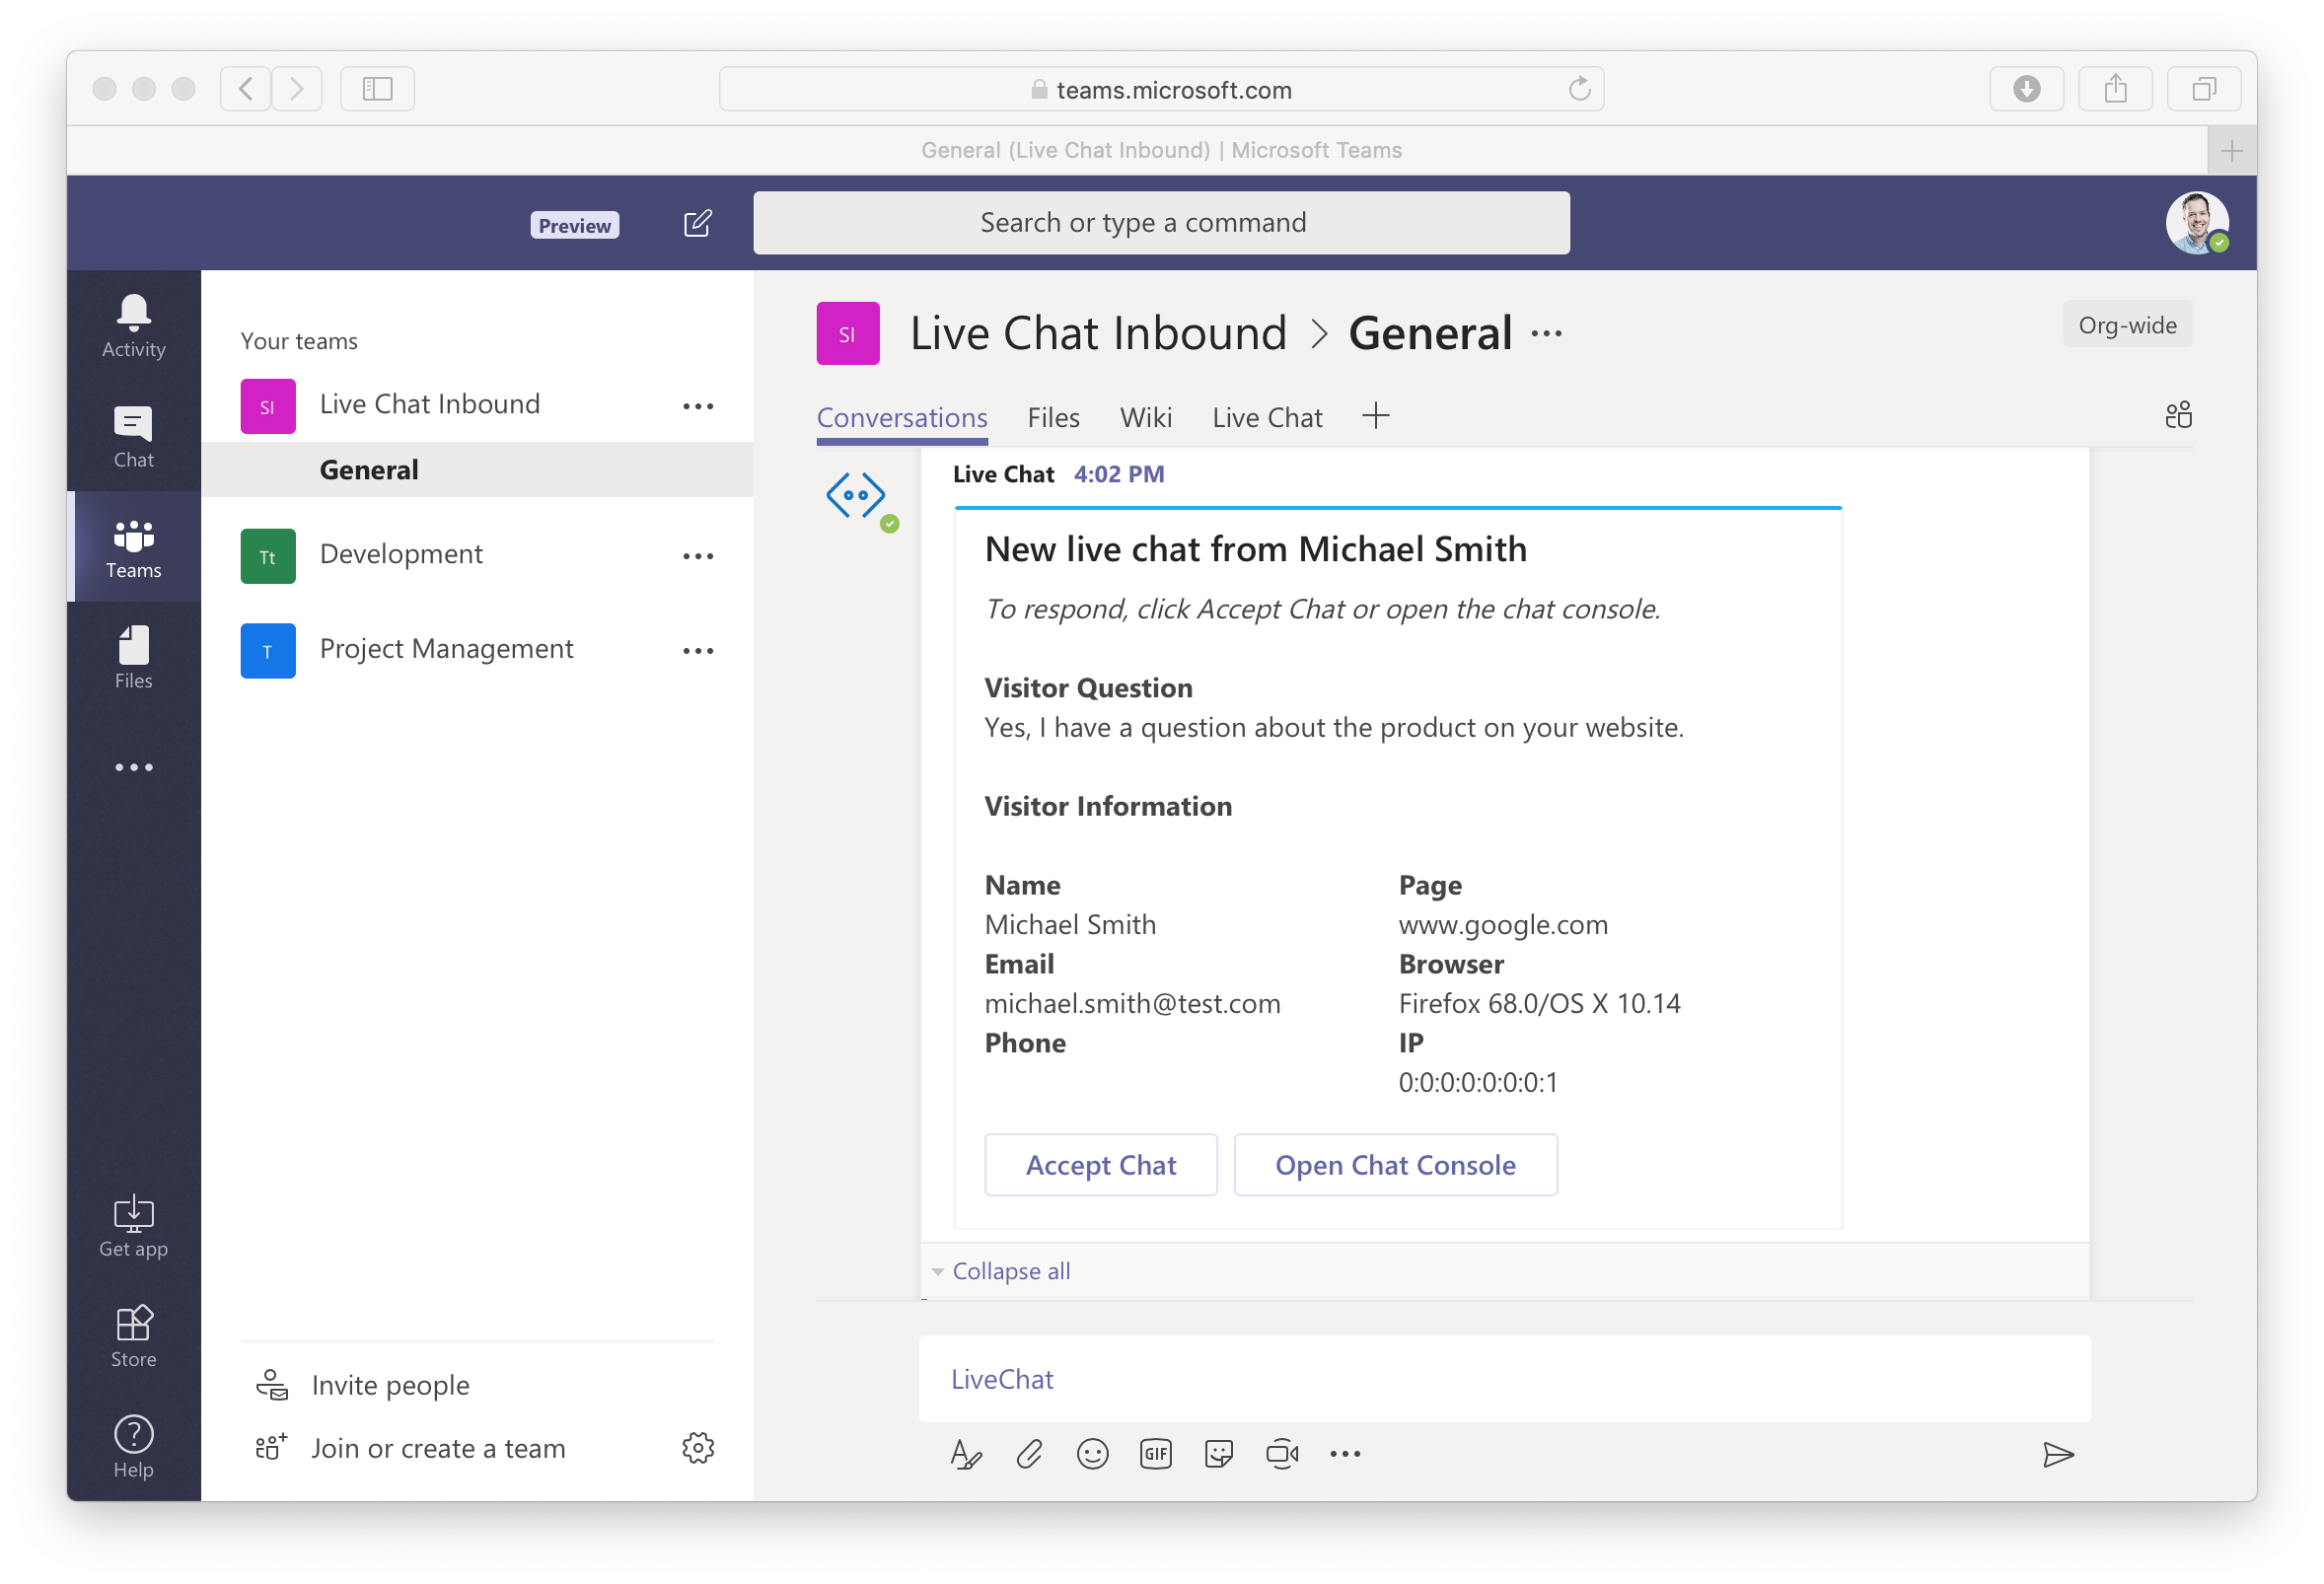
5. Preview your Live Chat and send a Test Chat.

Upon receiving the request, reply to the chat from Teams.