Live Chat Getting Started Guide
What is Social Intents?
Social Intents is a live chat and AI chatbot platform that lets your team chat with website visitors in real-time directly from the tools they already use.
Connect your website chat widget to Microsoft Teams, Slack, Google Chat, or Zoom so your team can respond to customers without leaving their existing workflow. Add an AI chatbot powered by ChatGPT, Claude, or Gemini to automatically answer common questions 24/7 and hand off to a human agent when needed.
Here are quick start guides if you're using any of these collaboration tools:
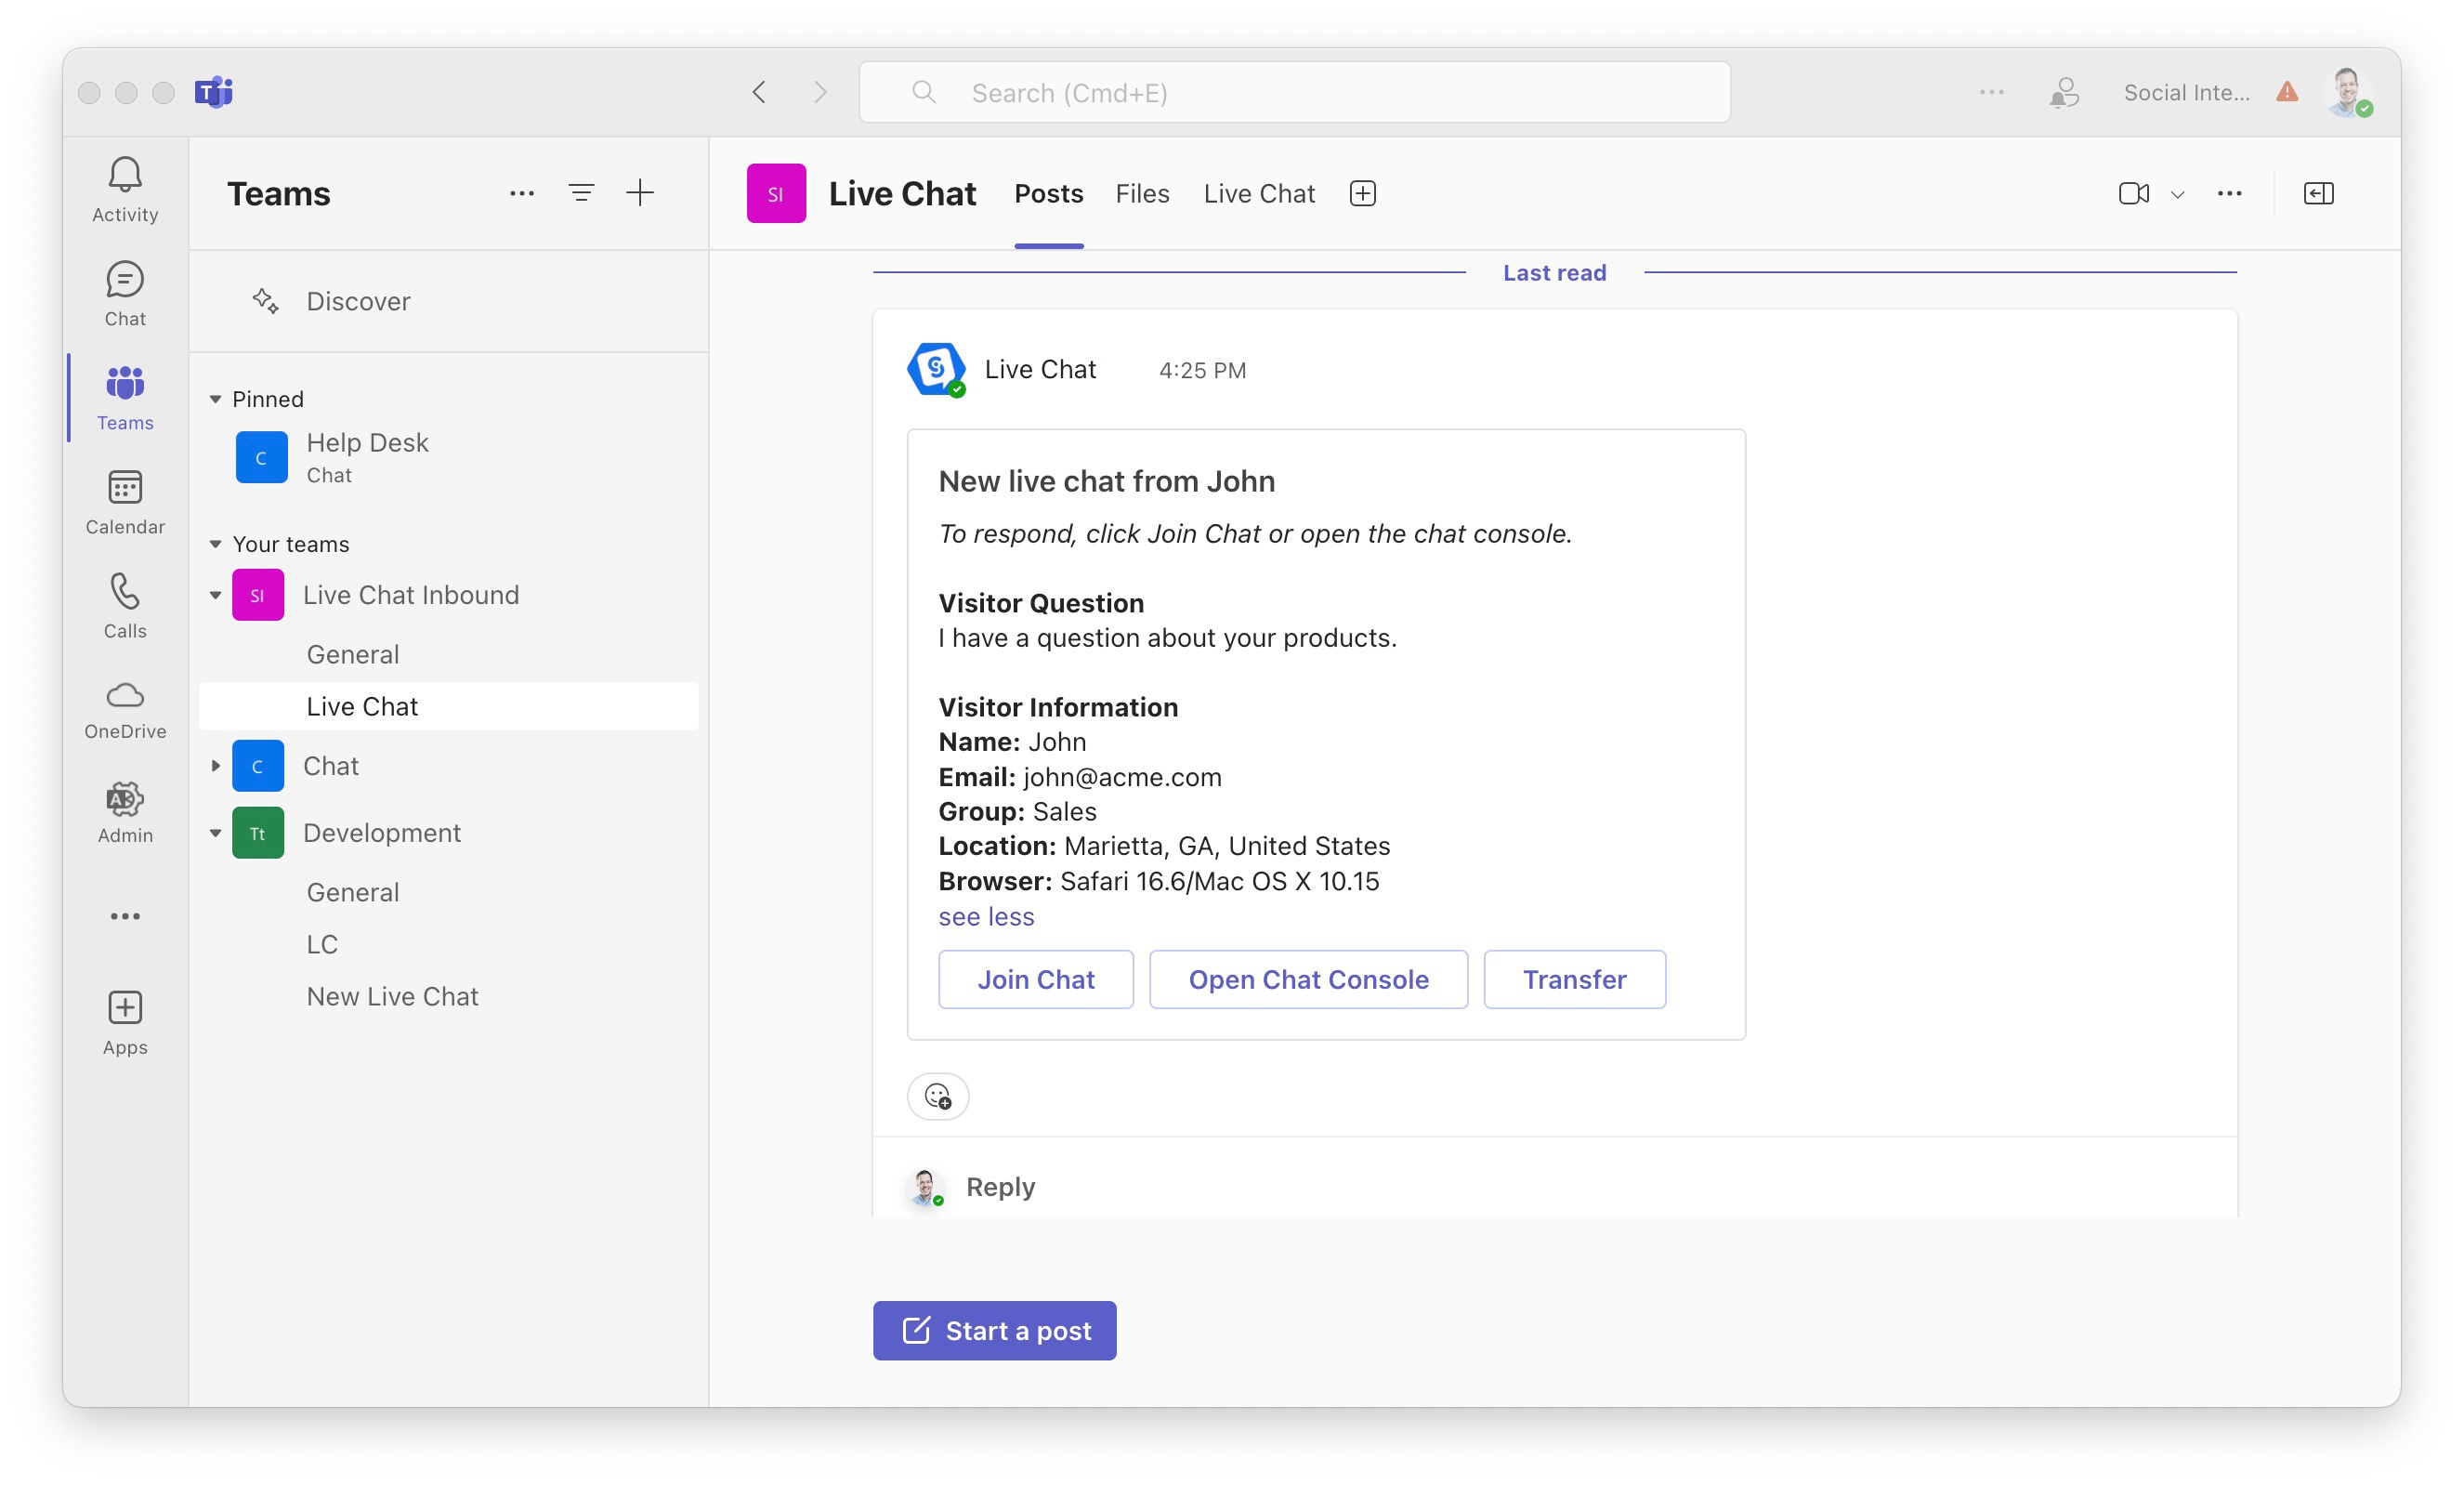
- Microsoft Teams Integration Guide
- Slack Integration Guide
- Google Chat Integration Guide
- Zoom Integration Guide
Step 1: Choose Your Chat Handling Method
As part of the initial setup process, you can choose how chats will be handled by your agents. We have a shared web inbox you can access in your web dashboard or your team can respond in the team collaboration tool you already use.
- Agent Integration – Pick your platform where agents will answer chats:
- Microsoft Teams
- Slack
- Google Chat
- Zoom
- Webex
- Or the built-in Web Inbox
- AI Chatbot – Configure the chatbot to handle initial conversations, answer common questions, and escalate to your team when needed.

You can switch between these options at any time, or combine them by using the AI chatbot as your first responder and routing complex chats to your team.
Step 2: Create a Live Chat Widget
- In the Social Intents dashboard, go to My Apps → Live Chat.
- Create your first widget.
- Save your settings. This will generate a code snippet for your website.

Step 3: Install Your Chat Widget
Add Code Snippet to a Website
Copy and paste the widget code right before the closing </body> tag of your site. If your platform doesn’t allow direct edits, you can place it anywhere inside the <body>.

For WordPress Users
- If you signed up via our WordPress plugin, just enter your Widget Key in the plugin settings.
- Settings sync automatically between the plugin and our servers.
- Find your Widget Key under the Your Code Snippet tab in your widget settings.

Step 4: Configure Notifications
Never miss a conversation with our flexible notification options:
- Browser Desktop Notifications (Chrome, Firefox, Safari)
- Collaboration Notifications – Get notified of new chat requests directly in Microsoft Teams, Slack, and Google Chat channels.
- Email Notifications (click to join the chat directly from email)
- Mobile Push Notifications (via Teams mobile app, Slack mobile app, or Pushover.net notifications app)
Step 5: Customize Your Chat Widget
- Online & Offline Text – Control what visitors see on the chat tab.
- Tab Color – Match your branding with any hex color.
- Custom Text & Languages – Translate or rewrite all system text for a personalized experience.
- Shortcuts – Create pre-written replies to answer common questions faster.

Step 6: Set Up Your Live Chat Agents
Add team members as agents with the following fields:
- Agent Name (internal only)
- Display Name (shown to visitors)
- Job Title (shown under the display name)
- Status – Online/Offline (can be set manually or automatically)

Admins can monitor and assist with all active chats. With multiple agents, your widget stays online as long as one agent is available.
Step 7: Handle Missed & Offline Messages
- All missed and offline chats are stored under History in the dashboard.
- You can search transcripts, respond later, and never lose a lead.

Step 8: Mobile Chat Support
- Chat with visitors on the go by responding from your email, Pushover app, or Slack/Teams/Google Chat mobile apps.
- All conversations sync across devices.
Best Practices
Here are some best practices for daily use of you live chat on your website. Following these will help quickly respond to customer inquiries and provide the best support for your customers.
- Log in and set yourself available every morning. Visitors only see the chat widget when at least one agent is online. Staying active drives more conversations.
- Respond within 60 seconds. Response time is the single biggest factor in chat satisfaction. Faster replies convert more visitors into customers.
- Use Shortcuts for your most common questions. Type
/in the chat input to insert saved replies instantly. Set up your top 5–10 shortcuts before your first shift. - Review missed and offline chats daily in History. Every unanswered chat is a potential lead. Follow up by email within the same business day.
- Let AI handle the volume, you handle the relationship. Configure your AI chatbot to answer FAQs automatically and escalate to a human agent for sales questions, complaints, or anything that needs a personal touch.
- Train your AI chatbot regularly. Add new URLs, PDFs, or knowledge base articles whenever your product or policies change. Better training = fewer escalations.
That's it! You're now ready to chat with your customers on the web!